Bunker Hill Security cameras show up at Harbor Freight for budget-conscious DIYers looking to add surveillance without hiring an installer or signing a monthly contract. These wired and wireless models promise basic home monitoring at a fraction of the cost of brand-name systems. But low price tags don’t always mean good value, especially when footage quality, durability, and tech support matter. This guide walks through what Bunker Hill cameras actually deliver, how to mount and configure them yourself, and whether they’re worth the savings for your property.
Table of Contents
ToggleKey Takeaways
- Bunker Hill security cameras offer low upfront costs under $200 for four-camera kits, making them ideal for budget-conscious homeowners avoiding monthly subscription fees.
- Installation requires planning camera placement, proper mounting on solid structures, sealing connections with silicone caulk, and connecting power and coax cables directly to a DVR—no internet dependency needed.
- These cameras deliver only basic 720p to 1080p resolution with soft, compressed footage that blurs license plates and faces beyond 15 feet, limiting their effectiveness for detailed surveillance.
- Bunker Hill security camera systems lack cloud backup, smart-home integration, and reliable mobile apps, with minimal customer support beyond a 90-day return window and rare firmware updates.
- Durability is a concern as cameras and power supplies frequently fail within two years; Bunker Hill works best for rental properties or secondary structures rather than primary residences with valuable assets.
- Common troubleshooting involves checking BNC connectors for corrosion, adjusting motion detection zones, managing ground loops with proper power strip placement, and replacing failed hard drives with standard 3.5-inch SATA drives.
What Is Bunker Hill Security Camera and Who Makes It?
Bunker Hill Security is a house brand sold exclusively through Harbor Freight Tools, the discount tool and equipment retailer. The line includes analog CCTV systems, wireless IP cameras, and DVR kits aimed at homeowners and small businesses on tight budgets. Harbor Freight sources these units from third-party manufacturers, typically overseas OEMs, then rebrands them under the Bunker Hill name.
You won’t find dedicated customer support phone lines or extensive online forums like you would with Ring or Arlo. Documentation tends to be minimal, often a single folded sheet with basic diagrams. Firmware updates are rare to nonexistent, so the feature set you buy is the feature set you keep.
Most Bunker Hill models are analog 960H or 720p AHD cameras paired with a standalone DVR. A few wireless IP models exist, but they lack cloud storage and integrate poorly with smart-home ecosystems. If you’re comfortable with older coax-based systems and don’t need smartphone alerts or AI detection, Bunker Hill can deliver functional surveillance. If you want modern conveniences, look elsewhere.
Key Features and Specifications
Bunker Hill cameras ship with barebones specs. Typical kits include four to eight bullet or dome cameras with 720p or 1080p resolution, a DVR with 500 GB to 1 TB storage, and pre-terminated coax cables in 60 ft or 100 ft lengths. Night vision uses infrared LEDs rated for 65–80 ft, though real-world performance drops to about 40 ft in total darkness.
Resolution: Older models max out at 960H (approximately 960×480 pixels): newer AHD versions hit 1280×720. Don’t expect 4K or even full 1080p on most units.
Recording: Motion-triggered or continuous loop recording to the internal hard drive. No cloud backup. If the DVR dies or gets stolen, your footage is gone.
Connectivity: BNC connectors for video, separate 12V DC barrel plugs for power. Wireless models use 2.4 GHz Wi-Fi only, no 5 GHz support, and often drop connection through walls or at range.
Weatherproofing: Outdoor cameras carry an IP66 or IP67 rating, meaning they handle rain and dust but not submersion. Connectors are the weak point: moisture creeps in if you skip the silicone sealant.
Viewing: Remote viewing via a proprietary mobile app (often called “XMEye” or “CloudSee”) or desktop software. The apps are clunky, require port forwarding on your router, and rarely receive updates. Many users report smart home device reviews highlight smoother experiences with mainstream brands, but Bunker Hill’s software lags behind modern standards.
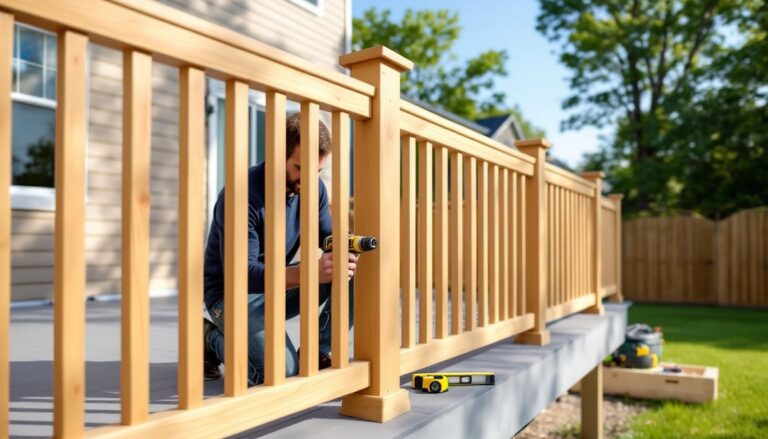
Step-by-Step Installation Guide for Homeowners
Plan your camera placement before drilling. Walk your property at dusk to identify blind spots, entry points, and lighting conditions. Mark mounting locations with painter’s tape, then verify the pre-made cables reach the DVR location. Running new coax through walls may require a fish tape and drywall patching.
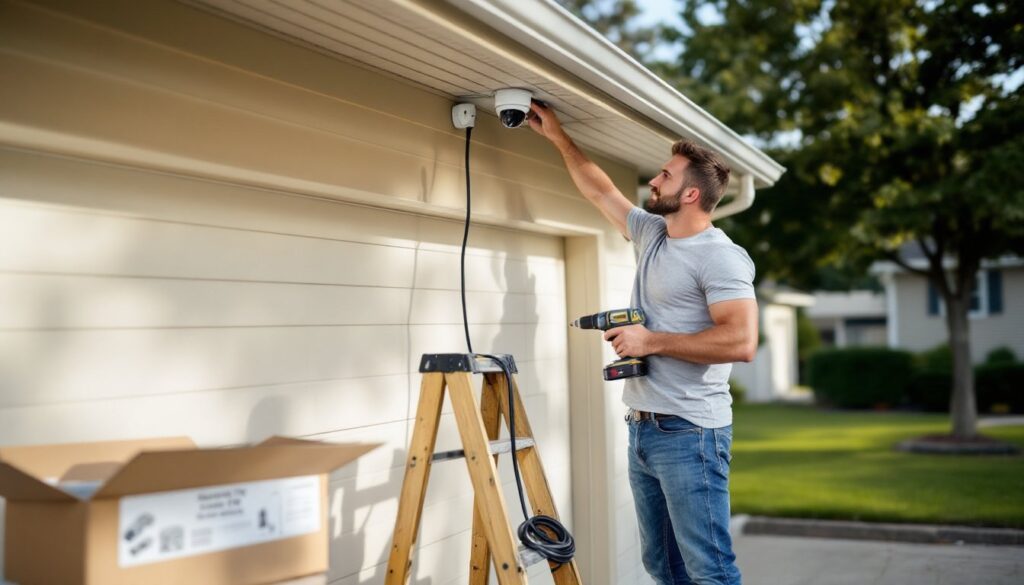
Mounting and Positioning Tips
- Choose solid backing. Mount cameras to wall studs, soffit framing, or masonry, not vinyl siding alone. Use ¼-inch lag screws with plastic anchors for brick or concrete.
- Angle downward 15–30 degrees. This captures faces and license plates better than a straight-on view. Avoid aiming cameras directly at bright lights or the sun.
- Keep lenses 8–10 ft high. Low enough for detail, high enough to deter tampering. If vandalism is a concern, use dome housings or protective cages.
- Seal the mount. Apply a bead of exterior-grade silicone caulk around the bracket and cable entry point. Water infiltration is the #1 cause of early camera failure.
- Test before finalizing. Connect one camera to the DVR, check the image, then adjust the angle. Lock the mounting ball joint or bracket only after confirming the frame.
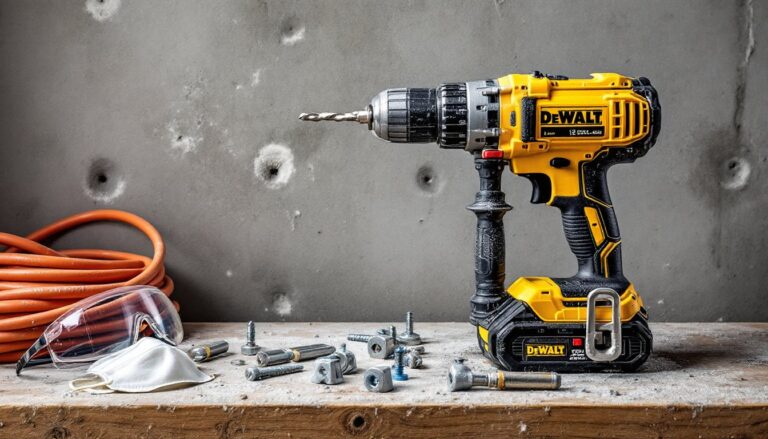
Connecting to Power and Network
- Run coax to the DVR. Thread BNC cables through walls or along soffits. Avoid sharp bends: coax kinks degrade signal quality. Secure cables every 3 ft with cable staples (not metal staples that pierce the jacket).
- Plug in power adapters. Each camera needs its own 12V supply unless you’re using a multi-port power distribution box. Label each adapter by camera location to simplify troubleshooting.
- Connect the DVR. Attach all BNC inputs, plug in the hard drive power and data cables, then connect the DVR to your router via Ethernet. Do not rely on Wi-Fi for the DVR, wired is far more stable.
- Configure the DVR. Power on, connect a monitor via HDMI or VGA, and follow the on-screen wizard. Set date/time, recording schedule, and motion zones. Write down the admin password: firmware often has no recovery option.
- Set up remote access (optional). Enable UPnP in the DVR settings or manually forward TCP port 37777 (common default) on your router. Install the mobile app, enter your DVR’s external IP or DDNS hostname, and log in. Be aware that opening ports exposes the DVR to the internet: change the default password immediately.
Safety note: Work with the power off when drilling near electrical lines. Wear safety glasses and a dust mask when drilling into concrete or stucco. If running cables through an attic in summer, hydrate and take breaks, heat exhaustion is real.
Pros and Cons: Is Bunker Hill Right for Your Home?
Pros:
• Low upfront cost. Four-camera kits often retail under $200, far less than subscription-based systems that charge monthly fees.
• No cloud dependency. Footage stays local: no internet outage or service shutdown kills your recordings.
• Simple wired systems. Coax is plug-and-play once installed. No Wi-Fi passwords, no app pairing, no firmware compatibility headaches.
• Adequate for basic monitoring. If you need to see who’s at the front door or verify a package delivery, 720p is sufficient.
Cons:
• Mediocre image quality. Even “1080p” Bunker Hill models often deliver soft, over-compressed video. License plates and faces blur beyond 15 ft.
• Weak mobile apps. The XMEye-style software is buggy, lacks push notifications, and often fails to load live streams over cellular data.
• No smart-home integration. You can’t trigger lights, send clips to Alexa, or integrate with Google Home. These are standalone islands.
• Minimal support. Harbor Freight’s return policy ends after 90 days. After that, you’re troubleshooting solo. Many home security camera comparisons favor brands with robust customer service and warranty coverage.
• Durability concerns. Cameras and power supplies frequently fail within two years, especially in harsh climates. Budget for replacements.
Bunker Hill makes sense if you’re securing a rental property, workshop, or secondary structure where premium features don’t justify the expense. For a primary residence with kids, valuables, or insurance considerations, investing in a home tech trends–aligned system with better support and reliability pays off.
Troubleshooting Common Issues
No video on one channel: Check the BNC connection at both ends. Reseat the cable firmly, coax connectors corrode if moisture gets in. Swap the camera to a known-good channel on the DVR to isolate whether the camera or DVR input failed.
Flickering or rolling lines: This indicates a ground loop or voltage sag. Plug all power adapters into the same power strip to equalize ground potential. If running cameras on long cable runs (over 150 ft), consider a 12V DC booster or upgrade to a higher-amperage supply.
Can’t view remotely: Verify the DVR’s IP address hasn’t changed (set a static IP in your router’s DHCP settings). Confirm port forwarding rules point to the correct internal IP and protocol (TCP). Test access from within your local network first: if that works, the issue is router configuration or ISP blocking.
Night vision washed out or too dark: Adjust the IR intensity in the DVR’s camera settings if available. Move the camera away from reflective surfaces like windows or aluminum siding, IR bounces back and overexposes the sensor. Clean the lens cover: dust and cobwebs diffuse infrared light.
Motion detection triggers constantly: Tighten the detection zone to exclude trees, flags, or high-traffic streets. Lower the sensitivity slider. Disable motion recording during known problem hours and rely on continuous recording instead.
DVR won’t boot: Listen for hard drive clicking, a failed drive is common after a power surge. Remove the drive, connect it to a PC with a SATA-to-USB adapter, and check if it’s recognized. If the drive is dead, replace it with any 3.5-inch SATA HDD (1–4 TB): Bunker Hill DVRs aren’t picky about brands, though formatting in the DVR menu is required.
Camera died within a year: Unfortunately, this is typical for budget units. Harbor Freight may replace it under warranty if you kept the receipt and it’s within the return window. Otherwise, source a generic 720p AHD camera from an online supplier, most are electrically compatible. Match the lens focal length (usually 3.6 mm or 6 mm) to maintain similar field of view.