Cutting full sheets of plywood with a circular saw is one of those skills that separates casual DIYers from confident builders. It’s not hard, but it does require the right setup and a few key techniques to avoid tear-out, wandering cuts, and kickback. Whether you’re building cabinets, installing subfloors, or framing out a shed, mastering plywood cuts with a circular saw will save time, money, and trips to the home center for re-cuts. This guide walks through everything needed to make straight, splinter-free cuts in plywood using a handheld circular saw, no table saw required.
Table of Contents
ToggleKey Takeaways
- Use a fine-tooth carbide blade with 40 to 60 teeth to cut plywood cleanly, avoiding the splintering that framing blades cause.
- Always support the entire plywood sheet with rigid foam insulation, 2×4 sleepers, or sawhorses with cross supports to prevent kickback and binding mid-cut.
- Clamp a straightedge guide parallel to your cut line at the saw’s base plate offset distance (1–2 inches), not the blade itself, for guaranteed straight cuts.
- Orient plywood with the good face down when cutting plywood with a circular saw, since the blade cuts upward and splinters the top surface.
- Set blade depth to just ¼ inch below the plywood’s bottom face to reduce tear-out, kickback risk, and motor strain.
- Apply painter’s tape over the cut line on the top face or score it lightly with a utility knife to reinforce the veneer and nearly eliminate splintering.
Essential Tools and Materials You’ll Need
Before making the first cut, gather the right gear. Using the proper blade and support setup makes a massive difference in cut quality.
Tools:
- Circular saw (corded or cordless: 7¼-inch is standard)
- Straightedge guide or factory-made cutting guide (an 8-foot aluminum level or a purpose-built clamp guide works well)
- Clamps (at least two, preferably four)
- Tape measure and pencil
- Speed square or framing square
- Safety glasses and hearing protection (mandatory)
- Dust mask (plywood dust is fine and irritating)
Materials:
- Plywood sheet (standard sheets are 4×8 feet: actual thickness varies, ¾-inch plywood is typically 23/32 inches)
- Sacrificial support (rigid foam insulation, 2×4 sleepers, or sawhorses with cross supports)
- Painter’s tape or masking tape (optional, for minimizing splintering)
Blade selection matters. For clean plywood cuts, use a fine-tooth carbide blade with 40 to 60 teeth. Framing blades (24 teeth) cut fast but leave rough, splintered edges. The extra teeth on a finish blade slice through the thin veneer layers cleanly. If cutting a lot of sheet goods, consider a dedicated plywood blade with alternating top bevel (ATB) teeth.
Preparing Your Plywood for Cutting
Most plywood failures happen before the saw even starts. Proper prep and support prevent binding, kickback, and botched cuts.
Support the entire sheet. Never cut plywood balanced on two sawhorses alone, the offcut will pinch the blade or fall and splinter. Use one of these setups:
- Lay the sheet across a full-size sheet of 2-inch rigid foam insulation on the floor or driveway. The saw blade cuts slightly into the foam without hitting concrete or dirt.
- Build a cutting grid with 2×4 sleepers spaced 16 inches apart, running perpendicular to the cut line. This supports both sides of the cut without the blade hitting framing.
- Use sawhorses with cross supports, ensuring both the main piece and the offcut stay supported through the entire cut.
Mark the cut line clearly. Measure twice, mark with a sharp pencil on the face side (the side that shows). Use a framing square or speed square to extend the mark if needed. For long rip cuts, snap a chalk line or use a straightedge to connect marks at both ends.
Plan the cut direction. Circular saws cut on the upstroke, so the face with the most tear-out is the top (the side facing up). If one side of the plywood will be visible, cut with the good face down. If both sides show, you’ll need additional tear-out prevention (covered later).
Acclimate the material. If the plywood’s been stored in a garage or shed, let it sit in the workspace for 24-48 hours before cutting. Plywood expands and contracts with humidity changes: cutting it fresh from different conditions can lead to warping or binding after installation.
Setting Up Your Circular Saw for Plywood
A properly tuned saw cuts straighter, safer, and with less effort. Take two minutes to dial in these settings before each session.
Set the blade depth. The blade should extend ¼ inch below the bottom face of the plywood. Deeper isn’t better, it increases tear-out, kickback risk, and motor strain. For ¾-inch plywood, that’s roughly 1 inch of blade exposure total. Unplug the saw, loosen the depth adjustment, set it by eye or with a scrap piece, and tighten firmly.
Check the blade angle. The base plate should be set to 90 degrees for crosscuts and rip cuts. Use a speed square against the blade (between teeth, not on them) and the base plate to verify. If it’s off, loosen the bevel adjustment and reset it. Even a 2-degree error compounds over a long cut.
Inspect the blade. Dull or damaged blades cause burning, binding, and tear-out. Carbide tips should be intact, and there shouldn’t be visible resin buildup. If the blade’s been used for pressure-treated or resinous wood, clean it with pitch remover or oven cleaner before cutting plywood.
Install a rip fence or guide. Most circular saws include a narrow rip fence that hooks onto the base plate. It’s fine for cuts within 6 inches of an edge, but for anything wider or longer, a clamped straightedge is far more accurate. An 8-foot aluminum level or a commercial saw guide (like the Kreg Rip-Cut or a Festool-style track) keeps the saw on line for the full length of the cut.
Step-by-Step: Making Straight Cuts in Plywood
With prep done and the saw set, making the cut is straightforward, but small technique details matter.
-
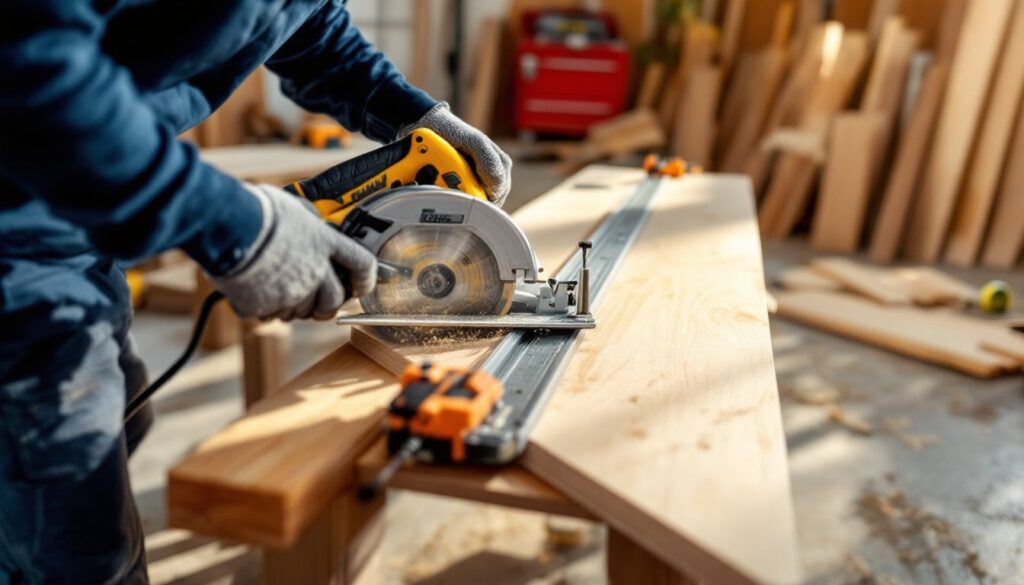
Position the straightedge guide. Measure from the cut line to the edge of the saw’s base plate, not the blade. Circular saws have an offset (usually 1 to 2 inches, depending on the model). Clamp the straightedge parallel to the cut line at that offset distance. Use at least two clamps: four is better for an 8-foot cut.
-
Put on PPE. Safety glasses, hearing protection, and a dust mask are non-negotiable. Plywood dust is fine and full of formaldehyde-based adhesives.
-
Start the cut off the workpiece. With the saw unplugged or battery removed, position the blade just before the cut line. Plug in or install the battery, then squeeze the trigger fully before the blade contacts wood. Let the saw reach full RPM.
-
Push the saw steadily forward. Keep the base plate tight against the straightedge, applying gentle sideways pressure to maintain contact. Don’t force the saw, let the blade do the work. A steady, moderate pace (about 1 inch per second for ¾-inch plywood) produces the cleanest cuts. Forcing it causes burning and blade deflection.
-
Support the offcut near the end. As you approach the end of the cut, the offcut may start to sag or pinch. Have a helper support it, or pause, turn off the saw, and reposition a sawhorse under the offcut before finishing the last few inches.
-
Complete the cut and let the blade stop. Push through the final inch, then release the trigger and let the blade come to a full stop before lifting the saw. Lifting a spinning blade invites kickback.
For freehand cuts (no guide), follow the pencil line with the saw’s notch or guide mark on the base plate. This requires practice and a steady hand, especially on projects inspired by detailed step-by-step DIY project tutorials. It’s fine for rough carpentry but not for finished work.
Preventing Splintering and Tear-Out
Even with a sharp blade, plywood’s thin face veneers can splinter. A few simple techniques nearly eliminate tear-out.
Cut with the good face down. Since circular saw blades cut upward, the bottom face gets a cleaner cut. The top face, where the teeth exit, tends to splinter. Orient the plywood so the visible side faces down.
Apply painter’s tape along the cut line. A strip of 2-inch painter’s tape or masking tape over the cut line on the top face reinforces the veneer and reduces splintering. Press it down firmly, then cut through it. Peel it off after. This works especially well on high-quality hardwood plywood (like birch or maple) where every splinter shows.
Score the cut line with a utility knife. For zero-tolerance finish work, score the cut line on the top face with a sharp utility knife and a straightedge. Make several light passes to cut through the veneer. When the saw blade exits, it breaks along the scored line instead of tearing.
Use a zero-clearance guide. Some aftermarket saw guides include a sacrificial strip that the blade cuts through, creating zero clearance around the cut. This prevents tear-out on both faces. Festool-style track saws do this by design: many enthusiasts who follow guides on woodworking project plans replicate the effect with shopmade plywood jigs.
Back up the cut. If you can’t cut good-face-down, clamp a sacrificial strip of scrap plywood or MDF directly under the cut line. The blade exits into the backer, which prevents tear-out on the bottom face. This is common in cabinet work where both sides of a panel are visible.
Common Mistakes to Avoid When Cutting Plywood
Even experienced DIYers make these errors. Knowing them ahead of time saves material and frustration.
Skipping the straightedge. Freehand cutting almost always results in a wavy cut. A clamped straightedge takes 30 seconds to set up and guarantees a straight line. There’s no substitute.
Cutting without support. If the offcut sags or pinches mid-cut, it can bind the blade and cause dangerous kickback. Always support both sides of the cut all the way through.
Using a dull or wrong blade. A 24-tooth framing blade will tear plywood to shreds. Invest in a 40- to 60-tooth finish blade: they’re available at any home center for under $20 and last for dozens of sheets. Many home improvement tools articles emphasize the value of the right blade for the material.
Measuring from the blade instead of the base plate. The saw’s base plate edge is the reference point, not the blade. Measuring to the blade will throw off the cut by 1 to 2 inches.
Forcing the saw. If the saw bogs down or smokes, you’re either pushing too hard or the blade is dull. Ease off and let the blade cut at its own pace. Burning the wood weakens the edge and dulls the blade faster.
Ignoring grain direction on veneer plywood. The face veneer grain direction affects tear-out. When possible, cut across the grain (crosscut) rather than with it (rip cut) on the top face to minimize splintering.
Not checking the offcut path. Before starting, trace where the offcut will fall. If it’s going to hit a wall, toolbox, or pile of lumber, move it. A falling sheet of plywood can cause injury or damage.
Conclusion
Cutting plywood with a circular saw is a fundamental skill that opens up a world of projects, from built-ins to sheds to subfloors. The key is proper support, a sharp fine-tooth blade, and a clamped straightedge guide. Take time on setup and blade depth, and the cuts will be straight and clean. With these techniques, there’s no need for a table saw for most sheet goods work.