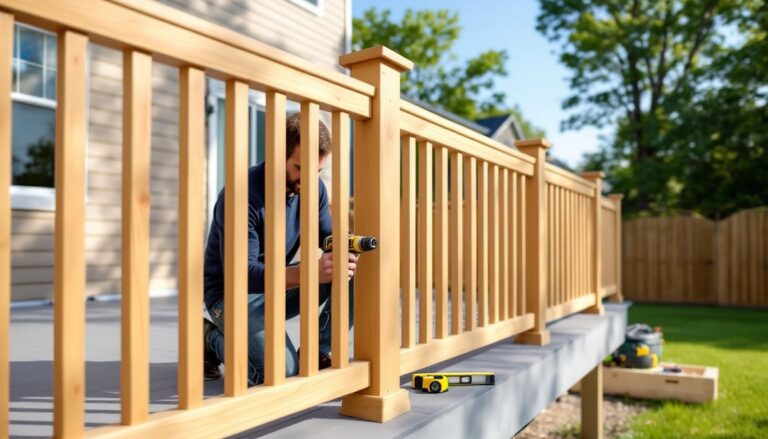
Deck railing posts are the vertical backbone of any railing system, and they do far more than hold up a few balusters. These structural components carry lateral loads from leaning guests, resist wind shear, and keep everyone safe at elevation. Get them wrong, wrong spacing, poor attachment, or undersized lumber, and you’ll face code violations, wobbly rails, or worse. Whether you’re building a brand-new deck or replacing weathered posts on an aging structure, understanding materials, code requirements, and proper installation techniques makes the difference between a railing that lasts decades and one that fails inspection.
Table of Contents
ToggleKey Takeaways
- Deck railing posts must resist lateral loads and be spaced no more than 6 feet apart to meet building codes and prevent structural failure.
- Pressure-treated 4×4 posts are the most economical option for residential decks, while composite and metal alternatives offer low-maintenance alternatives at higher upfront cost.
- Proper installation requires through-bolting deck railing posts to the rim joist with ½-inch galvanized bolts, plumb alignment verification, and sealed cut ends to prevent rot.
- Material choice—wood, composite, or metal—should align with your local climate, decking style, maintenance tolerance, and budget for a cohesive and durable railing system.
- Building code compliance is critical: verify maximum post spacing, minimum post size, attachment requirements, and high-wind specifications before beginning your deck railing project.
- Notching posts over the rim joist provides the strongest and most professional appearance, while surface-mounting offers an easier retrofit solution for existing decks.
What Are Deck Railing Posts and Why Do They Matter?
A deck railing post is a vertical structural member that anchors the railing system to the deck frame or directly to the ground. Posts typically sit every 4 to 8 feet along the perimeter, depending on railing design and local building codes. They bear lateral loads, the horizontal forces from people leaning, sitting, or pushing against the rail, and transfer those forces down into the deck’s rim joist, blocking, or concrete footings.
Most residential codes (like the IRC) require railings on decks more than 30 inches above grade. The top rail must withstand a minimum 200-pound concentrated load or a 50-pound-per-linear-foot distributed load applied in any direction. Posts are the key link in that load path. If they’re undersized, poorly fastened, or spaced too far apart, the entire railing system can fail, even if the balusters and top rail look solid.
Posts also define the visual rhythm of your deck. Fat timber posts give a rustic, hefty look: slender metal posts read modern and open. Choosing the right post isn’t just about meeting code, it’s about matching your home’s style and your own tolerance for maintenance.
Types of Deck Railing Posts: Materials and Styles Explained
Wood Railing Posts
Pressure-treated pine is the workhorse: inexpensive, code-compliant when rated for ground contact (.40 or .60 retention), and widely available. Standard post sizes are 4×4 nominal (actual 3.5″ × 3.5″) or 6×6 nominal (actual 5.5″ × 5.5″). The 4×4 works for most residential decks with standard post spacing: 6×6 posts suit commercial jobs, extra-tall railings, or longer spans.
Cedar and redwood offer natural rot resistance and better looks than PT lumber, but they cost two to three times more. They still need a sealer or stain every couple of years to prevent weathering to gray. For a detailed woodworking project requiring precision joinery, hardwoods like ipe or mahogany deliver unmatched strength and longevity, though they demand carbide-tipped blades and pre-drilling for fasteners.
Dimensional stability matters. Let wood posts acclimate for at least 48 hours before installation, PT lumber often arrives wet and can shrink as it dries, loosening bolts and brackets.
Composite and Vinyl Posts
Composite posts (brands like Trex, TimberTech, or Fiberon) pair polymer and wood fiber. They won’t rot, split, or need staining. Most are hollow sleeves that fit over a pressure-treated 4×4 core for structural support. The sleeve is cosmetic: the PT lumber inside does the real work. Some premium composites use aluminum inserts or reinforced cores for true structural capacity without wood.
Vinyl (PVC) posts are fully synthetic and lightweight. Like composites, most vinyl posts are sleeves over PT cores. They’re popular in coastal areas where salt air accelerates wood decay. Downsides: they can feel flimsy, fade under UV, and crack in hard freezes if not rated for your climate zone.
Both composites and vinyl eliminate the annual maintenance cycle, but they cost roughly double what PT lumber does. If budget is tight, save the composite for visible rails and balusters, and use PT for posts, you can sleeve them later.
Metal Railing Posts
Aluminum posts dominate modern and cable-rail systems. They’re corrosion-resistant, lightweight, and available in powder-coated colors or anodized finishes. Most aluminum posts are hollow extrusions with internal channels for cable or glass panel hardware. They mount via flanged base plates bolted through the deck surface or side-mounted brackets.
Steel posts (often powder-coated or galvanized) offer industrial strength and a sleek profile. They’re the go-to for glass railing systems, which impose higher lateral loads than traditional balusters. Steel can rust if the coating is scratched, so touch up any nicks immediately.
Metal posts require different fastening strategies than wood, through-bolting is standard, and you’ll often need blocking or steel reinforcement in the rim joist to meet pull-out resistance specs. Many advanced construction techniques involve sister joists or steel brackets to anchor metal posts without compromising the deck frame.
How to Choose the Right Deck Railing Post for Your Project
Start with local building codes. Pull a copy of the adopted IRC or your municipality’s amendments. Look for:
- Maximum post spacing (usually 6 feet on-center for wood, sometimes 8 feet for engineered systems)
- Minimum post size (often 4×4 for residential wood posts)
- Attachment requirements (through-bolts, lag screws, proprietary brackets)
- Height above decking (typically 36 to 42 inches for the top rail)
If you’re in a high-wind zone or coastal exposure area, expect stricter fastening and embedment requirements. Some jurisdictions require engineer-stamped plans for decks over a certain height or span.
Match your decking material. If you’ve installed composite decking, composite post sleeves over PT cores keep the look consistent. Mixing materials, say, metal posts with wood decking, can work visually if your home has modern trim or metal roofing. Avoid mismatched tones: gray composite decking clashes with warm cedar posts.
Budget and maintenance tolerance drive the final call. PT posts cost $10–20 each: composite sleeves run $40–80: aluminum posts start around $60 and climb to $150+ for cable-ready systems. If you’re handy and don’t mind re-staining every few years, wood is economical. If you want a set-it-and-forget-it deck, composite or aluminum justify the upfront cost.
Tool and skill level matter. Wood posts require a miter saw, drill, and basic carpentry. Metal posts need a drill, wrenches, and sometimes a metal-cutting blade. Some cable-rail systems involve tensioning hardware that demands patience and a second pair of hands.
Step-by-Step: Installing Deck Railing Posts Like a Pro
Tools & Materials
- 4×4 or 6×6 pressure-treated posts (or composite/metal equivalents)
- Galvanized or stainless through-bolts (½” diameter, 5–6″ length for double rim joists)
- Washers and nylon-insert lock nuts
- Post-base brackets (if surface-mounting on deck boards)
- Speed square, tape measure, level, pencil
- Drill with ½” spade bit or auger bit
- Socket wrench or impact driver
- Safety glasses, work gloves, ear protection
Step 1: Mark Post Locations
Measure and mark post centers no more than 6 feet apart along the deck perimeter (check your code). For corner posts, place them within a few inches of the corner to maximize railing support. Use a Speed Square to transfer marks from the rim joist down to the deck surface if you’re notching posts over the rim.
Step 2: Determine Mounting Method
You have three common approaches:
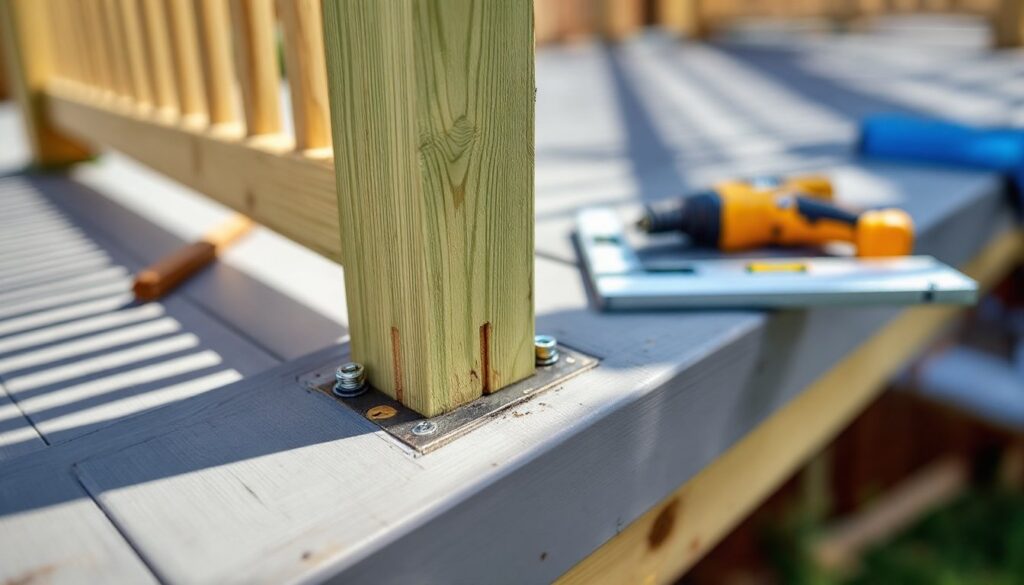
- Surface-mount brackets bolt through deck boards into blocking or rim joist below. Easy retrofit: posts sit on top of decking.
- Notched posts sit on the rim joist with a notch cut to clear the decking. Posts bolt through the rim. Strongest option and cleanest look.
- Through-bolted to rim (no notch): Posts butt against the outside face of the rim joist, bolted through from inside. Simple but posts stand proud of the deck edge.
For new construction or where aesthetics matter, notched posts are the gold standard. For a thorough step-by-step tutorial on carpentry joinery, notching techniques ensure a flush, professional fit.
Step 3: Cut and Notch Posts
Cut posts to finished height (typically 39–42 inches above the decking for a 36-inch rail after top rail is added). If notching, measure the depth of your decking plus any gap, then cut a 3.5-inch-deep × 1.5-inch-tall notch (for 5/4 decking) at the post bottom using a circular saw and chisel. Test-fit before final assembly.
Step 4: Drill Through-Bolt Holes
With the post positioned and plumb (use a 4-foot level on two adjacent faces), clamp it in place or have a helper hold it. Drill two ½-inch holes horizontally through the post and rim joist, spaced vertically 4–6 inches apart. Drill from the inside face of the rim joist outward to prevent splintering the post face.
Step 5: Install Through-Bolts
Insert ½” galvanized carriage bolts or hex bolts with washers under the heads. Slide a washer onto the threaded end, then thread on a nylon-insert lock nut. Tighten with a socket wrench until snug, don’t overtighten and crush the wood. Lock nuts resist vibration loosening over time.
Step 6: Check Plumb and Alignment
Before final tightening, verify each post is plumb in both directions and aligned with your layout marks. Adjust as needed, then torque bolts to final tightness. Walk the deck and push laterally on each post, there should be zero movement.
Step 7: Seal Cut Ends
Brush a copper-based end-cut preservative (like Tenino or Wolman CopperCoat) onto any fresh cuts, especially post bottoms and notches. This prevents moisture wicking and early rot.
Safety & Code Notes
- Always wear safety glasses when drilling overhead or cutting pressure-treated lumber.
- Pressure-treated sawdust is toxic, wear a dust mask and wash hands before eating.
- Some jurisdictions require blocking between joists behind each post location to distribute bolt loads. Check your local amendments.
- If your deck is more than 6 feet off the ground or if you’re unsure about structural capacity, hire a licensed contractor or structural engineer to review your plan. Railing failures can cause serious injury.
Final Tip: If you’re installing composite or metal railing components, follow the manufacturer’s installation manual to the letter. Proprietary brackets, cable tensioning, and fastener specifications vary widely, and most warranties are void if you deviate from the instructions.