Shark vacuums are workhorses, but they don’t stay that way without regular maintenance. Over time, hair wraps around brush rolls, dust clogs filters, and mystery rattles appear from deep inside the machine. Knowing how to disassemble your Shark vacuum lets you deep-clean components, replace worn parts, and troubleshoot performance issues without hauling it to a repair shop. Whether you’ve got an upright, a Lift-Away model, or a cordless stick, the basic disassembly process follows a logical pattern. This guide walks through the teardown step-by-step, covering everything from popping out the dust cup to accessing motor housings and hose connections.
Table of Contents
ToggleKey Takeaways
- Disassemble your Shark vacuum regularly to address common issues like hair-wrapped brush rolls, clogged filters, and mysterious noises without paying for professional repairs.
- Start with essential tools including Phillips and Torx screwdrivers, a flashlight, needle-nose pliers, and always unplug the vacuum before beginning the disassembly process for safety.
- The dust cup and filter assembly are the easiest components to access; wash foam filters monthly and replace HEPA filters every 6–12 months to maintain optimal suction performance.
- Hair and debris buildup at the brush roll and intake port are the most overlooked maintenance zones, so inspect and clean the brush roll’s end caps, bearings, and bristles regularly.
- Document your disassembly with photos and notes on screw locations to simplify reassembly, and test the vacuum briefly in an open area after putting it back together to catch any issues.
- Most Shark vacuum maintenance tasks cost under $20 in parts and take less than an hour, making DIY disassembly far more economical than professional repair services.
Why You Might Need to Disassemble Your Shark Vacuum
Most Shark vacuum issues stem from clogs, tangled brush rolls, or dirty filters, all fixable with a screwdriver and twenty minutes. If suction drops suddenly, check for blockages in the hose, wand, or floor head. Hair and debris love to wedge into tight bends where airflow slows.
Brush rolls collect hair faster than any other component. Pet owners especially know the struggle: a full wrap of fur stops the roller cold, burns the belt, and sometimes melts plastic housings. Disassembly lets you cut away tangles and inspect the belt for cracks or stretching.
Odd noises, grinding, squealing, or rattling, usually mean something’s loose or stuck. A pebble in the impeller, a cracked housing mount, or a failing bearing all require partial teardown to diagnose. Ignoring these sounds can turn a $15 part replacement into a $200 motor swap.
Filter maintenance is another reason to dig deeper. Shark recommends washing foam and felt filters monthly, but fine dust still cakes into pleats over time. Removing the entire filter assembly lets you tap out embedded grit and check gaskets for air leaks.
Finally, if you’re replacing a cracked dust cup, worn power switch, or frayed cord, you’ll need to access internal fasteners. Shark uses a mix of Phillips screws, Torx screws, and snap-fit clips, so understanding the disassembly order saves frustration and broken tabs.
Essential Tools and Safety Precautions Before You Begin
Start by unplugging the vacuum or removing the battery pack. Corded models can short-circuit if you accidentally bridge terminals during disassembly. Cordless models sometimes retain charge in capacitors even after the battery’s out, so wait a few minutes before touching internal wiring.
Gather your tools before you start:
- Phillips screwdriver (#1 and #2 sizes)
- Torx screwdriver (T10 and T15 for newer models)
- Flathead screwdriver or spudger for prying clips
- Needle-nose pliers for pulling hair from tight spots
- Scissors or seam ripper to cut tangled fibers
- Flashlight or headlamp to see into dark cavities
- Small containers to sort screws by location
Wear safety glasses when working around dust cups or filters. Months of fine particulate can puff into your eyes when you release latches. A dust mask is smart if you’re sensitive to allergens, vacuums trap everything from dander to drywall dust.
Work on a clean, flat surface with good lighting. Lay down an old towel to catch screws and protect the vacuum’s finish. Take photos with your phone as you disassemble, visual references beat memory when you’re reassembling thirty minutes later.
Keep a small notepad handy to sketch screw locations if your model uses different lengths in different holes. Forcing a long screw into a shallow boss cracks plastic housings, and Shark replacement shells aren’t cheap.
How to Disassemble the Dust Cup and Filter Assembly
The dust cup is the easiest place to start. Most Shark models use a release button or lever near the handle, press it and the canister pops free. On Lift-Away models, you’ll first detach the pod from the floor nozzle by pressing the Lift-Away release button.
Once the dust cup is separated, empty it over a trash can. Don’t bang it hard against the rim, Shark’s clear polycarbonate scratches easily, and cracks spread from stress points.
Next, remove the filter assembly. Shark typically uses a two-stage setup: a pre-motor foam filter near the dust cup and a post-motor HEPA filter near the exhaust. The pre-motor filter usually twists counterclockwise or pulls straight out. Some models have a foam sleeve over a pleated cartridge, separate both and note the order.
Wash foam and felt filters under warm tap water without soap. Squeeze gently, then let them air-dry completely for 24 hours before reinstalling. Damp filters kill suction and can grow mold in the housing. HEPA filters are usually not washable, tap them over a trash can to knock out loose dust, but replace them every 6–12 months per the manual.
To access the cyclone assembly (the cone-shaped separator inside the dust cup), look for small Phillips or Torx screws around the base. Some models have snap-fit tabs instead, slide a flathead screwdriver into the seam and gently pry. The cyclone lifts out, revealing a mesh screen underneath. Rinse this screen to restore airflow, but keep water away from any rubber gaskets or electronics.
If you’re dealing with persistent clogs, check the intake port where the wand connects. Hair and lint form a dense mat here. Many product reviews for home appliances point to this spot as the most overlooked maintenance zone.
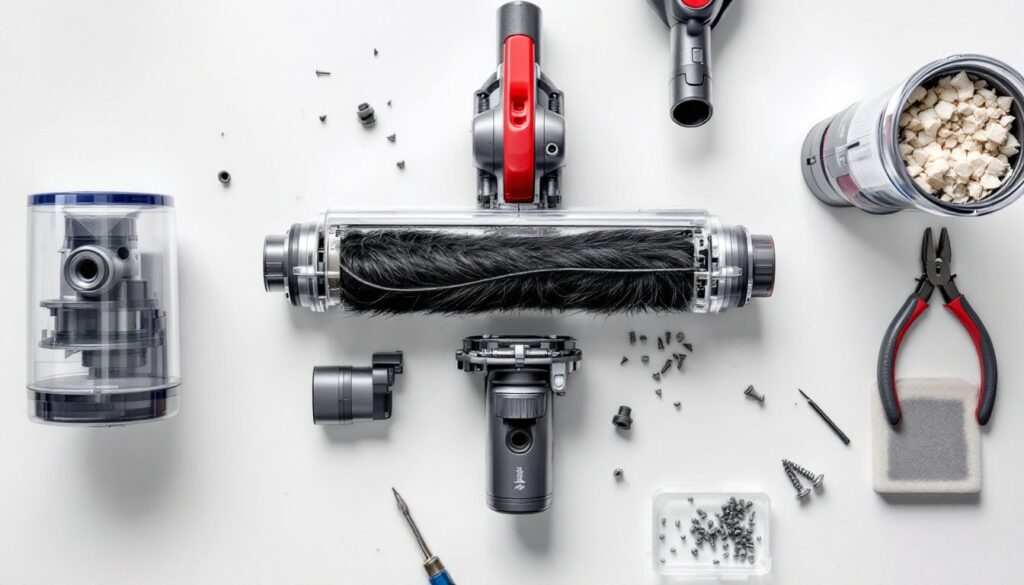
Removing and Cleaning the Brush Roll
Flip the vacuum so the floor nozzle faces up. Most Shark models have a removable brush roll cover secured by two to four screws or twist-lock tabs. On uprights, these screws are usually on the underside near the wheels. Lift-Away models sometimes hide screws under rubber flaps or stickers.
Once the cover’s off, the brush roll slides out sideways or lifts straight up. Some designs use a belt that loops around a motor spindle, note which way the belt routes before you remove it. If the belt looks stretched, cracked, or smells burnt, replace it. Shark belts cost around $5–10 and are model-specific, so check your vacuum’s model number (printed on the rating plate near the cord or battery).
Inspect the brush roll bristles. They should stand upright and feel stiff. Melted or matted bristles mean the roll seized at some point. Hair wraps usually concentrate at the bearing ends, cut them away with scissors, then use needle-nose pliers to pull out stubborn strands.
Check the end caps (the plastic or metal pieces that hold the roll in the housing). They should spin freely. If they’re stiff or cracked, you’ll need replacement end caps or a new brush roll assembly. Worn bearings cause the roll to drag, which overheats the motor and reduces agitation.
Wash the brush roll under running water if it’s caked with grime. Let it dry completely before reinstalling, moisture can swell the bristles and throw the roll off-balance.
For Shark Lift-Away models specifically, the floor nozzle often detaches from the wand with a release button, making brush roll access even easier. This is where learning how to take apart shark lift-away vacuum components really pays off, the modular design lets you service the nozzle on your workbench instead of crouching on the floor.
Taking Apart the Main Body and Handle Components
If you need to access the motor housing, hose connections, or electrical switches, you’ll disassemble the main body. Start by removing any visible screws on the exterior, check around the handle grip, the swivel neck, and the base of the Lift-Away pod. Shark often hides screws under rubber grips or adhesive labels.
On corded models, the cord rewind mechanism is usually housed in the lower body. To remove it, unscrew the cord wrap post and disconnect the internal power leads. Do not attempt electrical repairs unless you’re comfortable with basic wiring. Frayed cords near the plug or handle should be replaced by a qualified repair tech or Shark’s service center.
The handle assembly separates from the body via screws located inside the handle tube. Some models require you to remove the hose first, twist the hose collar counterclockwise and pull. Check the hose for cracks or punctures by running your hand along its length while suction is off. A split hose leaks air and kills performance.
To split the housing halves, remove all perimeter screws, then gently pry along the seam with a flathead screwdriver. Work slowly, internal wiring and hose clamps can snag. Once open, you’ll see the motor, circuit board, and airflow pathway. Vacuum out any debris with a shop vac (ironic, but effective).
If you’re troubleshooting a power issue, inspect the thermal cutoff switch, a small disc with two wires near the motor. It trips when the motor overheats and resets once things cool down. If it’s blown (no continuity with a multimeter), replace it. Motors themselves are usually not user-serviceable: a failed motor means replacing the entire assembly or retiring the vacuum.
For guidance on routine upkeep that prevents major teardowns, seasonal repair guides often cover vacuum longevity tips alongside HVAC and appliance checklists.
Reassembling Your Shark Vacuum Correctly
Reassembly is disassembly in reverse, but details matter. Start with the motor housing if you opened it. Route wires carefully so they don’t pinch between housing halves. Tighten screws in a crisscross pattern to avoid warping plastic.
Reinstall the brush roll by sliding it into the end brackets, making sure the belt seats properly on the motor spindle and the roll. Spin it by hand, it should rotate smoothly without binding. Snap or screw the cover back on, checking that it sits flush. A raised corner means something’s misaligned inside.
Reattach the dust cup and filter assembly. The cyclone cone should lock into place with a click or quarter-turn. If it wobbles, you’ve missed a tab or gasket. Test-fit the filters before snapping the dust cup onto the body, a crooked filter jams the cup release button.
If you removed the hose, reconnect it by aligning the collar with the intake port and twisting clockwise until it locks. Tug gently to confirm it’s seated.
Before plugging in or installing the battery, do a visual check: Are all screws tight? Any leftover parts on your workbench? (If yes, stop and figure out where they go.) Does everything snap or slide into place without force?
Run the vacuum for 30 seconds in an open area. Listen for rattles, check suction at the hose end, and watch the brush roll. If something sounds wrong, power down and retrace your steps. Most post-repair issues come from crossed wiring, forgotten gaskets, or belts that slipped off the spindle.
Keep your disassembly photos and notes in a folder, next time you’ll move twice as fast.
Conclusion
Disassembling a Shark vacuum isn’t complicated once you understand the order of operations. Most maintenance tasks, cleaning filters, clearing clogs, replacing brush rolls, take under an hour and cost less than $20 in parts. You’ll extend the machine’s life, restore suction, and avoid the hassle of shipping it out for repairs. If you hit a snag, Shark’s parts diagrams and model-specific manuals (available on their website) clarify fastener locations and part numbers. Keep your tools organized, work methodically, and your vacuum will reward you with years of reliable service.